Circular Saw Blades
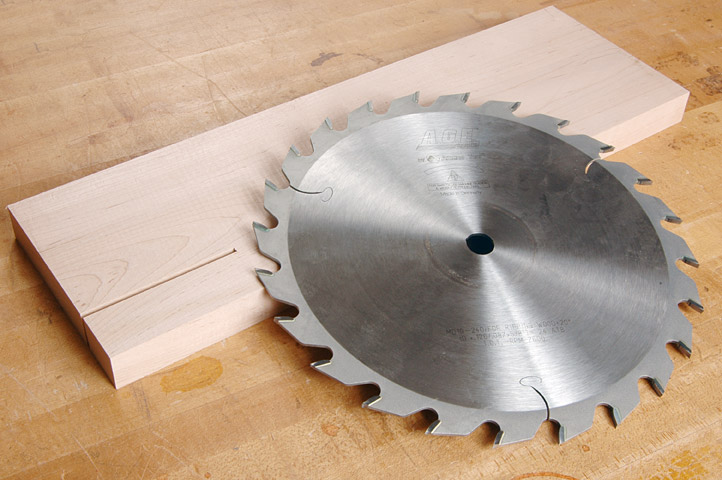
Without a doubt, the most important part of any saw is the blade. Just like tires on a car, the right saw blade on your saw can make dramatic improvements in performance. These days there are a number of different types of blades available so that you can opt for the best blade to suit the work-at-hand; some are general purpose while many are designed for specific materials or types of cuts. But with the myriad of blades from which to choose how do you select the best blade for the job? Once you understand the basics of how saw blades function selecting the best blade for the job is easy.
Saw Blade Structure
This section illustrates the naming conventions for parts of circular saw blades and describes the materials generally used in their construction. Saw blades are remarkable testaments to engineering, but you don't need to be an engineer to understand the basics and choose the right blade.
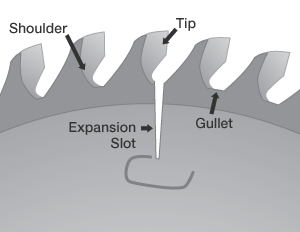
The steel plate or body of the blade is ground flat and smooth in order to achieve the truest possible cut. Standard blades have thicker plates and provide smoother cuts than comparable thin-kerf blades. However, generally speaking, thin-kerf blades require less horsepower.
Saw Blade bodies heat up and expand during cutting. Slots in the plate help dissipate heat and provide for expansion so that the blade remains flat and cuts true.
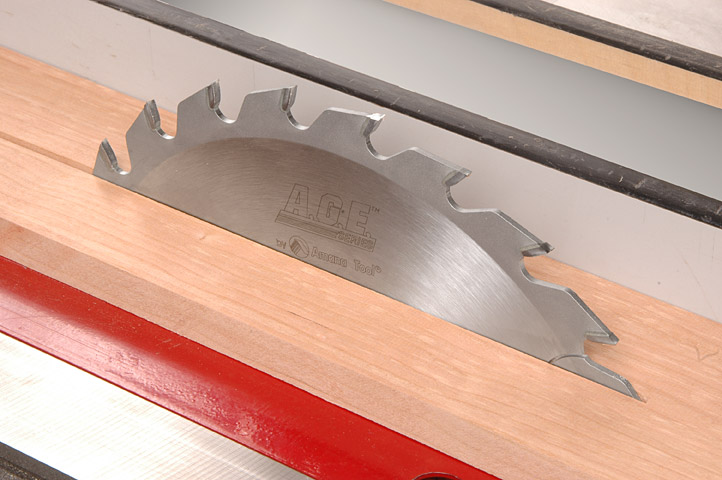
The large gullets on rip blades are designed to efficiently pull the sawdust from the kerf. The teeth have a positive rake angle for aggressive cutting. The tops of the teeth are flat or slightly beveled to efficiently remove the sawdust from the kerf.
Crosscut blades have a high tooth count for a smooth cut across the grain. The top of each tooth is sharply beveled to shear the wood cleanly.
Radial-arm blades and sliding miter saw blades have a negative tooth angle to help prevent these types of saws from self-feeding.
The materials from which saw blades are manufactured play a big role in the life and performance of the blade.
- Steel blades are inexpensive and work well for cutting softwood; however, they dull quickly in hardwood.
- High-speed steel blades (HSS) are harder than steel blades and stay sharper longer.
- Carbide blades have carbide tips attached to their teeth. They're more expensive than other blades but stay sharp much longer than steel or high-speed steel.
- Diamond blades use diamond-tipped teeth designed for cutting ceramic tile, glass and concrete.
- Abrasive blades are made of abrasive material for cutting concrete, brick, cinder block and other masonry materials and metals.
Saw Blade Types
Today, there are more specialty saw blades to choose from than ever before. Although the most common sawblades are designed for ripping and crosscutting solid wood there are a number of specialty blades for cutting man-made sheet stock such as MDF and plywood, plastic coated materials such as melamine, and even demolition blades that are designed for cutting through an occasional nail.
Like a lot of woodworkers, I keep a combination blade on my tablesaw much of the time. With its time-tested combination blade design, four alternate top bevel teeth with one flat-top raker, it effectively rips and crosscuts both solid wood as well as sheet stock, although not as effectively or efficiently as specialty blades. However, in many cases, the small tradeoff is worth it. I save a lot of time by not continually switching back and forth between rip and crosscut blades. So you're probably thinking "why not just mount a combination blade on your tablesaw and leave it there?" The answer: it depends.
For example, if I'm ripping a few boards for a drawer, the combination blade works fine. But when ripping a large stack of hardwood stock, I switch to a rip blade. The large gullets and aggressive tooth angle will smoothly and effortlessly rip all day long without bogging down the saw. And for silky-smooth miters, I use 80-tooth miter blade. The sharp 20 degree top bevel easily shears tough end-grain for gap-free miter joints. The bottom-line? You'll often be more productive by taking a minute and switching to a specialty blade.
Let's take a closer look at a few of the most popular styles of specialty blades and discuss how they may be put to use in your shop.
Rip Saw Blades
Ripping a stack of hardwood can push your saw to its limits. But a great rip blade will reduce the load on both you and your saw. That's because rip saw blades are specifically designed for smooth, efficient cuts while reducing the feed resistance normally associated with ripping.
Rip saw blades have a fewer number of teeth than crosscut or combination blades, typically twenty-four on a ten inch blade. The low tooth count combined with large gullets and a 20 degree hook angle makes the rip saw blade fast and aggressive. Laser-cut expansion slots help keep the plate flat to virtually eliminate vibration and lower the noise.
Glue-line rip blades use a special triple-chip tooth grind and an extra high hook angle. The unique tooth grind allows aggressive feed rates while at the same time producing a cut so smooth that the surface is ready for gluing—no jointing required!
Crosscut Saw Blades
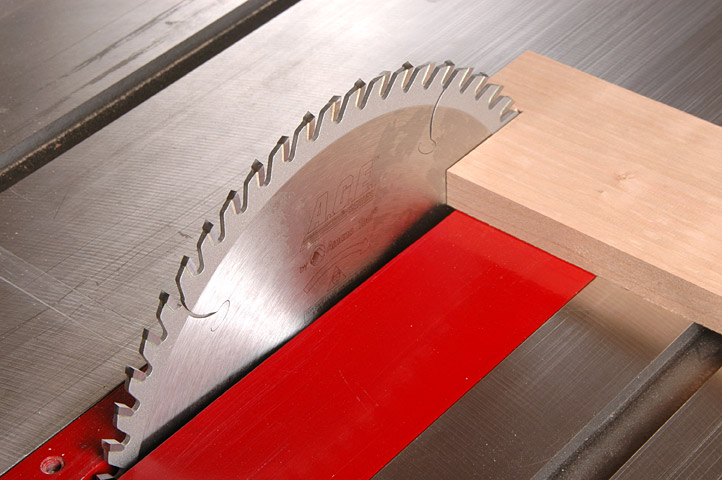
When the job requires the cleanest possible cut across the grain I use a crosscut blade. Crosscut blades have lots of teeth, usually 60 to 80, and an alternate top bevel (ATB) tooth design. The bevel angle is sharp, typically 15 degrees, in order to cleanly shear the tough end-grain fibers. Although a combination blade will effectively cut end grain, a crosscut blade will leave a much smoother surface. This is important when the end grain will be seen and touched, such as when making a table top.
If you own a sliding miter saw or a radial-arm saw you'll want a crosscut blade that is specially designed for these machines. Sliding miter saws and radial-arm saws have a tendency to self-feed which leaves the wood torn and ragged and can sometime even grab the stock—a potentially dangerous situation. The negative hook angle of radial-arm and sliding miter saw blades pushes the stock downward and against the fence to provide an extra margin of safety.
Miter Saw Blades
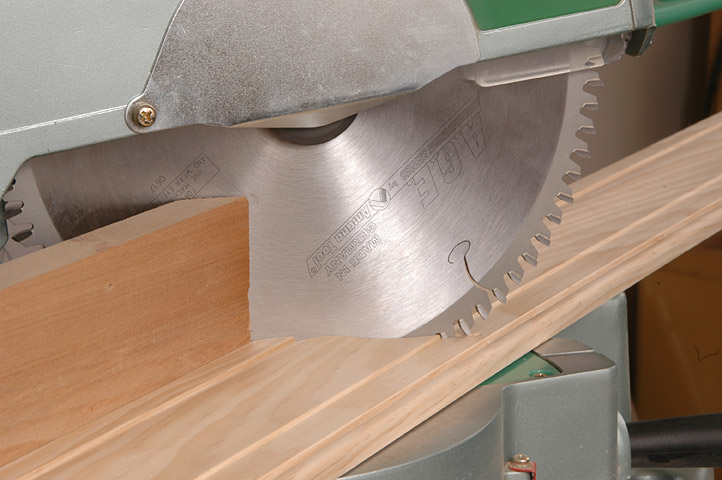
With 80 teeth and a negative hook, miter blades are the blade to choose when you want glass-smooth miters that are ready for assembly. The best miter blades use a thick, carefully ground steel plate to ensure smooth, accurate cuts. Perfect gap-free miters for picture framing industry.
Plywood/Laminate Saw Blades
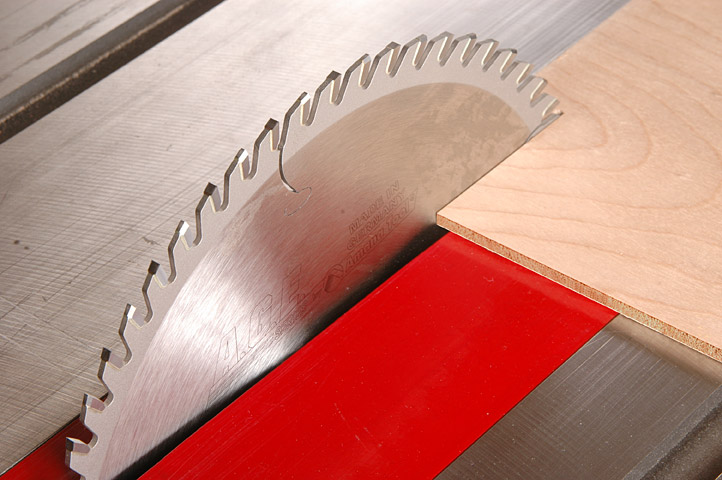
Plywood can be a bit of a challenge to cut without chipping or splintering the veneer on the back side; plastic laminates are also difficult to cut because the brittle plastic veneer tends to chip. Plywood and laminate saw blades eliminate the chipping and splintering by incorporating a triple-chip tooth grind along with a high tooth count and a 10 degree hook angle. The result is a smooth finish and minimal feed resistance on a variety of sheet stock from hardwood veneered plywood to MDF and TCG. These unique specialty blades are ideal for use in custom cabinet shops.
Melamine Saw Blades
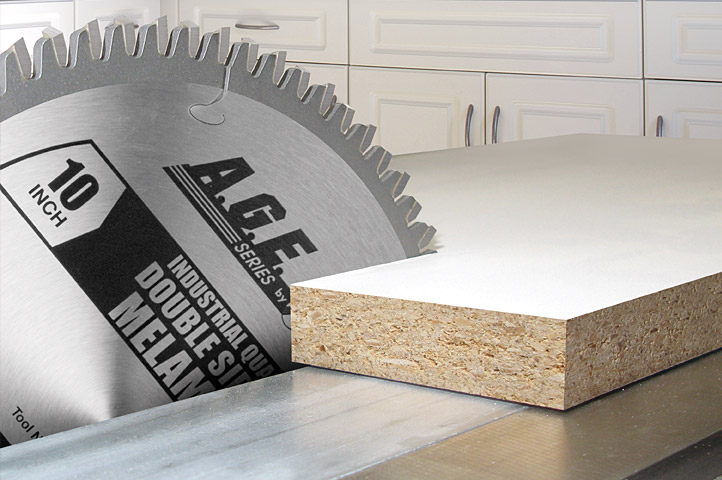
One of the greatest challenges in any cabinet shop is to cut Melamine without chipping the brittle, fragile face. The answer is the Melamine blade. The extra-sharp 30 degree top bevel combined with the high tooth count produces a flawless finish on Melamine and materials covered with plastic laminate.
Non-Ferrous Saw Blades
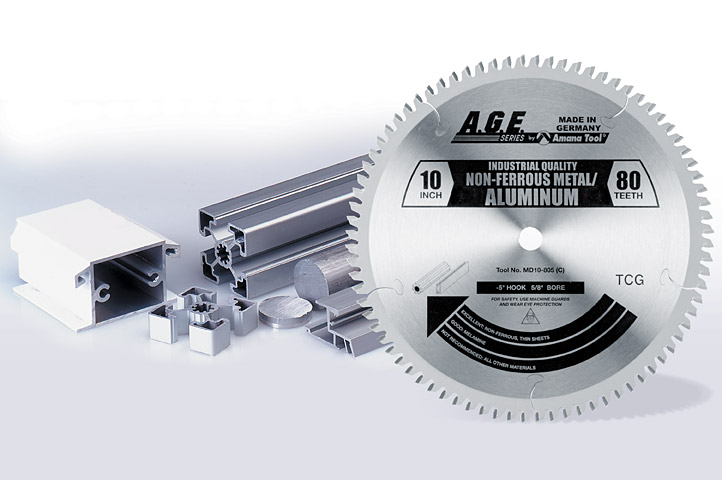
As the name implies these specialty saw blades are specifically designed for cutting non-ferrous materials such as brass, copper, and aluminum. The rugged design of this blade makes it specially suited for rough, abusive applications.
To help prevent grabbing and over-feeding the blade uses a chip limiting design. This blade can be used in tablesaws, radial-arm saws, and miter saws.
Steel Saw Blades
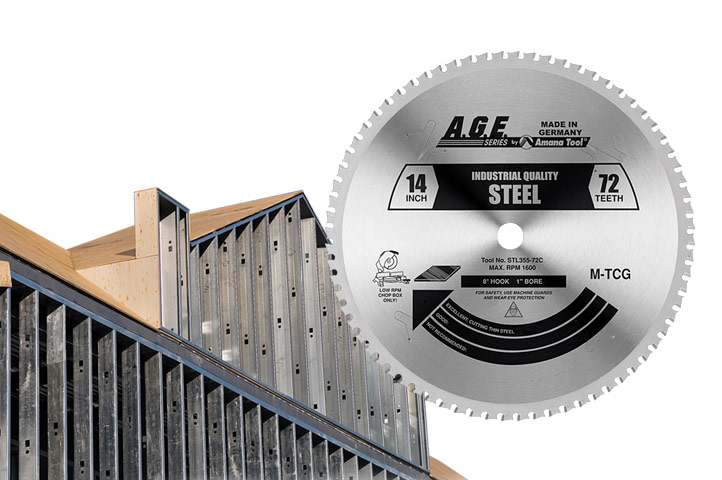
Designed to easily cut through steel studs, steel sheets, metal rods, steel pipes, channels and rebar. Specially designed carbide grade resists breakage and lasts longer than standard carbide or abrasive discs. The ideal blade for cutting through all sorts of metal due to its unique tooth geometry, special carbide and its chip limiting steel support. To be used on special cut-off machines such as Jepson. Using the right RPM (low) is critical.
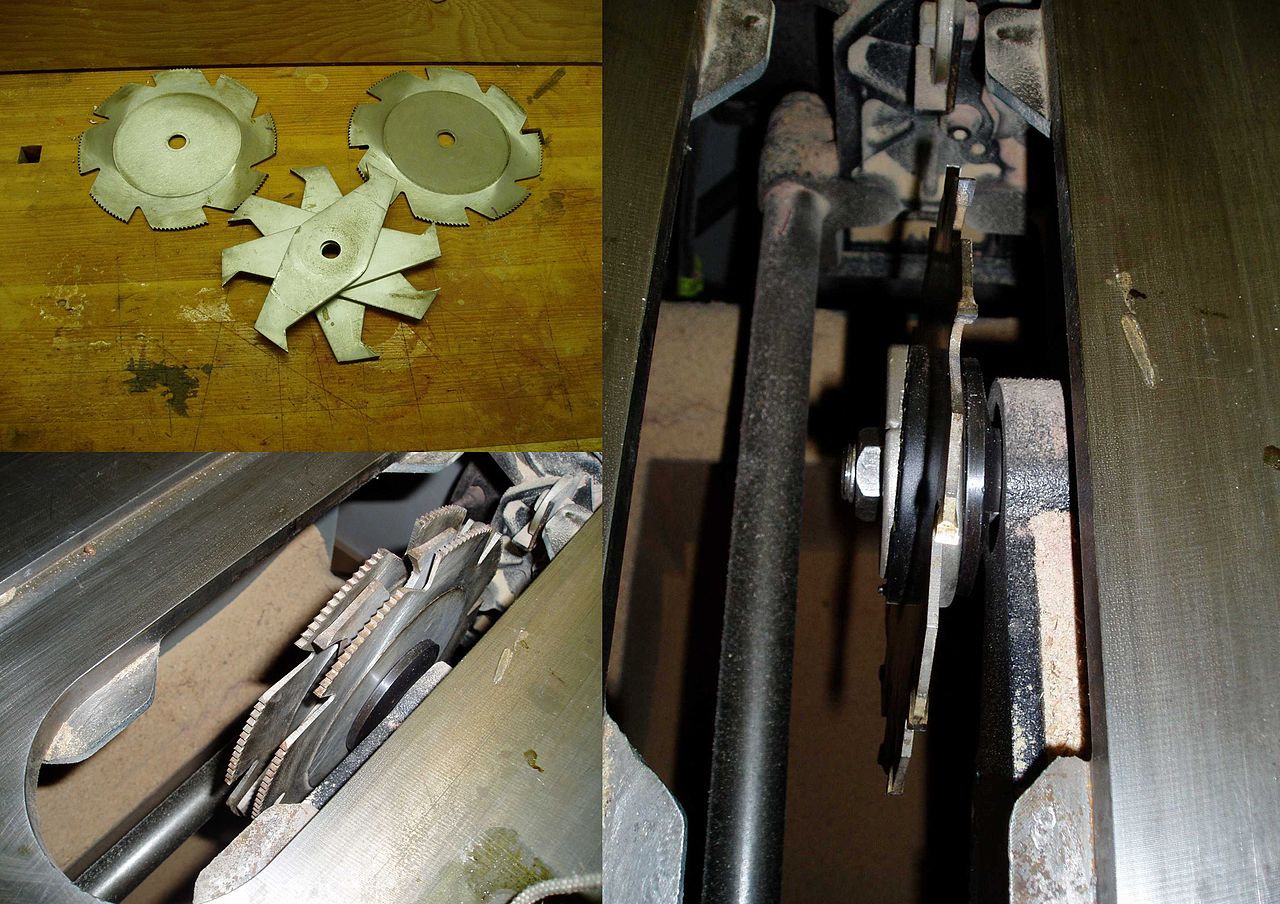
Dado Blade Sets
A dado set or dado blade is a type of circular saw blade, usually used with a table saw or radial arm saw, which is used to cut dadoes or grooves in woodworking. There are two common kinds of dado sets.
The first kind, known as a stacked dado set consists of two circular saw blades fixed on either side of a set of removable chippers. As the dado set spins, the two outside blades cut the dado walls and the chippers remove the waste material between and smooth the bottom of the dado. The chippers are added or removed to the set as required to make a dado of the desired width. Chippers can also be interspersed with spacers to finely adjust the dado width. Consequently, changing the dado width requires the complete removal of the dado blade set from the arbor, disassembly, addition or removal of chippers and/or spacers to achieve the desired width, reassembly and reinstallation onto the arbor.
The other kind is known as a wobble blade or wobble dado consisting of a circular blade mounted on an adjustable, multi-piece hub that varies the angle of the blade to the arbor shaft. The width of the dado cut increases as the angle gets farther from being perpendicular to the arbor. While it is possible to adjust the thickness of the cut while the saw is mounted on the arbor, accurate adjustment is usually difficult because tightening the arbor nut often changes the adjustment. Also, wobble blades, because of their inherent geometry, cannot produce a flat-bottomed dado, which may be a disadvantage in certain joinery operations. Another disadvantage of a wobble dado to that of a stacked dado is its introduction of undesirable vibrations whose magnitudes vary with the blade's angular off-set (i.e., the wider the dado, the stronger the vibrations).
Saw Blade Maintenance
You'll get better results and a longer life from your sawblades if you follow a few simple guidelines for their care.
Protect the teeth—carbide teeth are brittle and can be chipped or broken if dropped or allowed to contact other tooling. Use care when installing blades and store them so that they are not in contact with other blades or bits.
Keep them clean—the teeth on a sawblade undergo a tremendous amount of heat and stress during cutting. As a result, gum and dirt will build up on the tooth surfaces. Use a blade cleaner to remove the crud.
Keep them sharp—when the feed resistance begins to increase or the quality of the cut suffers slightly it's time for sharpening. Avoid touching up the tooth surfaces yourself; you'll risk spoiling the cutting geometry. Instead, take the sawblade to a professional saw sharpening shop and have the teeth ground.